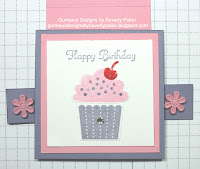
Yesterday I shared a Stampin' Up! Waterfall Card with you, and promised to provide you with a tutorial today. Here's the tutorial:
1. Select your card stock, designer series papers (DSP), brads, stamp sets, jewels, etc., that you want to use to create your waterfall card.
2. Cut and fold in the middle a 5-1/2" x 8-1/2" piece of card stock to form a 4-1/4" x 5-1/2" card base on which the waterfall construction will be attached.
3. Using card stock and DSP, create the first and second layers for the card base (not the waterfall piece). Do not adhere them to the card base until the last step as you'll need to attach the waterfall construction to these layers BEFORE adhering them to the card base.

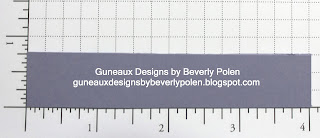
4. Cut a 3/4" x 4" piece of card stock. (Left click on the pictures for a better view.)
5. Cut a 2-1/4" x 8-1/2" piece of card stock of a different color.
6. Cut four 2-3/4" square pieces of card stock, four 2-1/2" square pieces of a different color of card stock, and four 2-1/4" square pieces of Whisper White card stock. The pieces from the two colored card stock will form the mat for the Whisper White card stock that will contain your desired stamp images, punched items, etc.
7. Score the 8-1/2" piece of card stock at the 1-1/2", 2", 2-1/2", 3", and 3-1/2" measurements.
8. Turn the scored piece of card stock (henceforth called template) vertically so the score lines are at the top. Attach Sticky Strip to the very top of the card stock (I added two pieces just to ensure good adhesion as the constructed waterfall will be heavy).
12. (a) Begin constructing the waterfall. The waterfall for this card will flow vertically; therefore turn the template so it is vertical and add the squares in a vertical fashion. If you want the waterfall to flow horizontally, turn the template horizontally and add the squares to the template in a horizontal fashion. (The adjacent picture is turned horizontally just to identify the "areas" of the template.)
 (b) Place adhesive in Area 1 (see the two pictures). Beginning with the matted square that you want to be LAST in the waterfall, adhere it to the template.
13. Place adhesive in Area 2 and add the matted square that you want to be the NEXT TO THE LAST waterfall piece. Continue until you've attached all four waterfall pieces, with the front piece added to area 4.
14. Fold the template at the top score line at area 4 so it falls behind the constructed waterfall and the tab falls at the bottom (see picture). Decorate the tab if so desired.
14. If you already attached the brads, you may need to remove them so you can line up the waterfall construction piece onto the card layers (created in step 3). Based on the punched holes on the horizontal 3/4" x 4" piece of card stock, identify and mark where to punch holes into the card layers, and punch them. Insert the brads through the waterfall construction piece and the card layers, turning down the brads' extensions. Do NOT add adhesive any where on the completed waterfall piece or it will not work.
15. Adhere the card layers and waterfall piece to the front of the card base.
16. Pull the tab vertically and watch your waterfall in action. ENJOY!
If you have questions regarding the tutorial, feel free to email me!
God's Blessings!
Guneaux Designs by Beverly Polen
Stampin' Up! Demonstrator in FL


2 comments:
Congratulations your card is very beautiful! The tutorial will come in very useful, very well done!
Sorry for the bad english ;)
Kisses, Moki
http://mokinwonderland.blogspot.it/
I can't wait to make this!!! Thank you.
Post a Comment