Pages

Friday, December 30, 2011

Guneaux Designs Newsletter


Do you have difficulty coming up with crafting projects? Would you like to receive regular, recurring newsletters with projects, tips, and more?

Sign up to join the Guneaux Designs Email Club today in time to receive the January issue of the Guneaux Designs Newsletter.

Where do you sign up? Fill out the box to your left. If you are a Stampin' Up! Demonstrator, please check the relative box.

God's Blessings!
Guneaux Designs by Beverly Polen
Stampin' Up! Demonstrator in FL

Saturday, December 24, 2011

Christmas Poem

Today, I want to share with you a poem I wrote that relates to our military men, women, and children.  May God richly bless them on this day and every day!

"TWAS THE DAY BEFORE CHRISTMAS"  
 
T
was the day before Christmas while at the store,
The children were crying as their Daddy was away at war.
"I want this for Daddy" was one of their cries,
"Maybe this will put a smile in his big brown eyes."
"Daddy will be home soon," Mommy declared,
As she bowed her head, asking for that blessing in a pray.
Oh how painful to observe such a sight,
My heart was saddened for all the children whose parents are absent tonight.
May we pray for all the men and women who protect our freedom,
And share our blessings with their lonely children.
May God wrap his protective arms around the Americans at war,
And lift their spirits as our mighty flag soars.
Let us remember the reason for the season,
As we give thanks that the wars are not on our shores.
When we gather around the gifts and food galore,
May we bow our heads in thanks for God's precious blessing,
The one who laid in a manger, many years before.
May all be blessed with a Merry Christmas and Happy New Year, and let us be joyful for our great country, the U.S.A.!

Thursday, December 22, 2011

Stampin' Up! Clearance Rack Blitz

Are you taking advantage of the Stampin' Up! Clearance Rack Blitz?  If you're not, hurry up as the clearance items are available only until they last, or no later than January 5, 2012.  Don't miss out on the 80% off products!

BUY CLEARANCE ITEMS HERE!

Wednesday, December 21, 2011

Stampin' Up! Valentine Box

Is it time yet to focus on the next cardmaking and papercrafting holiday?  It is for me!  Therefore, I am beginning to focus on Valentine's Day with this cute tin Valentine Box.


The Valentine Box gives you a sneak peek at FIVE upcoming Occasions Mini 2012 products and ONE Sale-A-Bration (SAB) product.  The Occasions Mini products are the Blossom Punch (125630), White Waffle Paper (125591), Blushing Bride Smooch Spritz (125580), Cherry Cobbler Dazzling Details (125585), and Fashionable Hearts Embosslits Die (125596).  The SAB product is the Outlined Occasions Stamp Set (126016).

The top of the Valentine Box is covered with Whisper White Cardstock that I spritzed with the Blushing Bride Smooch Spritz.  I made one Real Red and two Whisper White flowers with the upcoming Blossom Punch.  Inside the two Whisper White flowers are hearts made with the upcoming Fashionable Hearts Embosslits Die.  The sentiment on the box top is from the Hand-Penned Holidays Stamp Set that is found in the Holiday Mini that expires on January 3, 2012.  The "BE MINE" sentiment on the Chocolate Chip heart is from the Outlined Occasions Stamp Set from the upcoming SAB catalog.  


The last picture shows the inside of the Valentine Box.  At the top is Whisper White Cardstock that is spritzed with the Blushing Bride Smooch Spritz and the outer rim is covered with the upcoming Cherry Cobbler Dazzling Details.  The sentiment is from the You Are Loved Stamp Set, which also expires on January 3, 2012.  The bottom of the Valentine Box is lined with the upcoming White Waffle Paper

Enjoy!

 PURCHASE STAMPIN' UP! PRODUCTS HERE!

OR
CLICK ON THE PRODUCT LINKS ABOVE AND YOU WILL BE TAKEN DIRECTLY TO THE PRODUCT TO BUY!
God's Blessings!
Guneaux Designs by Beverly Polen
Stampin' Up! Demonstrator in FL

Tuesday, December 20, 2011

Stampin' Up! Holiday Stockings Christmas Cards

I wanted to share today my darling Christmas cards that I made for my grandson and granddaughter by using the Stampin' Up! Holiday Stockings Bigz L DieWhen I make cards for my grandchildren, I make them exactly the same.  I don't want one of them to think my affection for the other is different, which it isn't.  I love my grandchildren so immensely!  I wish the love that every child receives could be equivalent to or more than my intense love for my children and grandchildren.  
Now, let me share information about the cards.  The primary papers used are the Red Glimmer and Silver Glimmer PapersThe insides of the cards (text covered) feature a design from the Frostwood Lodge Designer Series Paper, and include more Red Glimmer Paper.

I left the inside top of the stocking's toe unglued so I could insert a gift.


The back side of the cards features the same design from the Frostwood Lodge Designer Series Paper.

Enjoy!!


BUY STAMPIN' UP! PRODUCTS HERE!


 God's Blessings!
Guneaux Designs by Beverly Polen
Stampin' Up! Demonstrator in FL


CLICK ON THE LINKS WITHIN THE POST TO BUY STAMPIN' UP! PRODUCTS!

Monday, December 19, 2011

Holly Berry DSP - Stampin' Up! Box Card

I am excited to share with you my box card that is made with the Stampin' Up! Holly Berry Bouquet Specialty Designer Series Paper (DSP) and Pines & Poinsettias stamp set.

 Inside the box card are several gifts tags to use when wrapping presents.  The tags were made with several of Stampin' Up! stamp sets.

The sentiment in the bottom of the box is from the Stampin' Up! God's Blessings stamp set.

Other Stampin' Up! products used in making the box card are:

Card Stock:  Garden Green, Brushed Gold, and Red Glimmer Paper
Ink:  Real Red, Chocolate Chip, and Garden Green
Accessories:  Chocolate Chip 5/8" Satin Ribbon, Perfect Pennants Bigz L Die, 1-3/4" Scallop Circle Punch, Antique Brads , and Champagne Glitter Glass

Purchase the project products by clicking on the links above.


God's Blessings!
Guneaux Designs by Beverly Polen
Stampin' Up! Demonstrator in FL

FIRM RELIANCE ON DIVINE PROVIDENCE!

Friday, December 16, 2011

Stampin' Up! Christmas Card - Serene Snowflakes

Here's a last-minute, easy-to-make Stampin' Up! Christmas Card for you! 

The card is made with Stampin' Up! Pacific Point Card Stock and features the Stampin' Up! Serene Snowflakes and Bells & Bough (sentiment) stamp sets.  The snowflakes were stamped with VersaMark and embossed with White Embossing Powder.  The base is also embossed with the Designer Frames Embossing Folder in which sits the sentiment.  The large snowflake gives you a sneak peak of a new product that debuts on January 4, 2012 along with the Occasions Mini Catalog.  The product is Large Basic Pearls Jewels (item # 125577).  I really like the larger pearls.  The other snowflakes are embellished with smaller Basic Pearls Jewels.  Now, how easy is that!!  It's very simple but beautiful!

BUY YOUR STAMPIN' UP! PRODUCTS HERE!

God's Blessings!
Guneaux Designs by Beverly Polen
Stampin' Up! Demonstrator in FL


FIRM RELIANCE ON DIVINE PROVIDENCE!

Thursday, December 15, 2011

Stampin' Up! White Waffle Paper Christmas Tree

Hello, my friends, and thanks for stopping by to see my Stampin' Up! creation for today.  I hope you had a great weekend buying more goodies for the holidays! 

The card share today, which features iris folding, gives you a sneak peek of White Waffle Paper (item # 125591) that debuts on January 4, 2012 along with the new Occasions Mini Catalog.  The Christmas tree is "iris folded" with the Stampin' Up! White Waffle PaperStampin' Up!'s waffle paper is superb for iris folding, and this white is so striking.
The card base is made with Stampin' Up! Cherry Cobbler Card Stock, star with Brushed Gold Card Stock, and tree trunk with  Gold Waffle Paper.  I used a permanent marker to color the Basic Rhinestones that are on the tree.  I think they really pop with the white background.  Lastly, the "iris" of the tree is made with Stampin' Up!'s Red Glimmer Paper.

The picture below gives you a closeup of the White Waffle Paper.

God's Blessings!
Guneaux Designs by Beverly Polen
Stampin' Up! Demonstrator in FL

guneauxdesignsbybeverlypolen.blogspot.com
guneauxdesignsbybeverlypolen.stampinup.net
beverlypolen@guneauxdesigns.com

BUY STAMPIN' UP! PRODUCTS HERE!


Wednesday, December 14, 2011

Stampin' Up! Pine Cone Christmas Ornament

I recall being on vacation in South Carolina around 2001 and seeing some very LARGE pine cones.  I had never seen such large cones before.  I bagged up a bunch and took them home (Northern Virginia) to decorate for Christmas. 


(CHECK OUT MY NEW WEBSITE:   STAMPINGWITHGUNEAUXDESIGNS.COM)

This Stampin' Up! Christmas Pine Cone Ornament reminds me of those pine cones.  It is my significant Stampin' Up! 3-D item for Christmas 2011.  It is 7" in length and 4-1/2" in width.  I am so pleased with the way it turned out.  

Once again, I used the Holly Berry Bouquet Specialty Designer Series Paper (DSP), my favorite Stampin' Up! DSP for the holidays.
It took hours for me to make the pine cone, and it required MANY 1" x 2" pieces of the DSP and MANY straight pens.  But it is so worth it!
I used the Stampin' Up! Red Glimmer Paper for three rows around the cone, and for the poinsettia that rests on top of the cone.

Tell me what you think about the cone.  If you're interested in a tutorial, let me know.  Enjoy!

Purchase your Stampin' Up! products HERE.

God's Blessings!
Guneaux Designs by Beverly Polen
Stampin' Up! Demonstrator in FL 

FIRM RELIANCE ON DIVINE PROVIDENCE!

Tuesday, December 13, 2011

Large Doily Sizzlit and Rue Des Fleurs Stamp Set

What about a break from Stampin' Up! Christmas Cards?  I have a cute one for you that features beautiful Stampin' Up! products in Stampin' Up!'s 2012 Occasions Mini and Sale-A-Bration (SAB) catalogs!  Wait until you see and feel these products!

This greeting card spotlights three upcoming products:  Everyday Enchantment Designer Series Paper (item #126154 (SAB), Large Paper Doily Sizzlits Die (item #125592) (Occasions), and Rue Des Fleurs Stamp Set (item #125487) (Occasions).

SAB is the best time of the year to purchase Stampin' Up! products as you can get a FREE product with each $50 purchase.  SAB begins on January 24, 2012.  And, you only have 22 more days until the debut of the Occasions catalog!

Now, back to the card.  The card base is made with the beautiful Pool Party Card Stock, and it features a kitchen scene with a table, lamp, and bowl.  The table, which I drew, is covered with a Poppy Parade table cloth made with the upcoming Large Doily Sizzlits Die (I purposely left in some of the "cut outs").  The lamp's body actually is a corset that is a stamp image from the upcoming Rue Des Fleurs Stamp Set.  I used the Ornament and Pinking Hearts Border Punches to create the lamp shade.  I think it's so cute!  Did you notice the wall paper and chair rail?  Well, the wall paper is from the Everyday Enchantment Designer Series Paper, which you can get free if you buy Stampin' Up! products totalling $50 (excludes taxes and shipping) during SAB.  The "chair rail" was made with Poppy Parade Card Stock.

The sentiment, "Thanks for your support" is also from the Rue Des Fleurs stamp set.  Do you get it?  Corset and Support!  I think this stamp set is so cute and it's one you'll want to buy to add to your Stampin' Up! collection.  I hope you enjoy the card.

BUY STAMPIN' UP! PRODUCTS HERE!

God's Blessings!
Guneaux Designs by Beverly Polen
Stampin' Up! Demonstrator in FL

Monday, December 12, 2011

Stampin' Up! Snowman Greeting Card - Iris Folding


I hope you had a great weekend, and thanks for stopping in to see this Stampin' Up! greeting card that features the art of iris folding.  I really like the card, and I think it's very cute, don't you?  Have you created greeting cards featuring the art of iris folding?  If not, I encourage you to give it a try; it is so fun and you get such a feeling of accomplishment.  There are a lot of good patterns on the Internet to use.  I have created my own patterns before, but this snowman is not one of mine. 

As for the design of the card, the base is Garden Green card stock and the first layer is Real Red card stock.  The Frostwood Lodge Designer Series Paper was used for the snowman's hat and scarf, as well as the photo corner pieces.  The rim of the hat is made with the Silver Glimmer Paper.

The snowman's body is made with Whisper White card stock that was embossed with the Snow Burst Embossing Folder.  Enjoy!

Purchase the products used for this project by clicking on the product links and you'll to be taken to my Stampin' Up! on-line store.

God's Blessings!
Guneaux Designs by Beverly Polen
Stampin' Up! Demonstrator in FL

Friday, December 9, 2011

Stampin' Up! Christmas Card - Pines and Poinsettias

Here is another beautiful Stampin' Up! Christmas card featuring the Stampin' Up! Pines and Poinsettias stamp set and the Holly Berry Bouquet Specialty Designer Series Paper (DSP).  This DSP is so beautiful and I hope Stampin' Up! brings it back in the 2012 big catalog! 

Other products used to create this card are:

Card Stock:  Chocolate Chip, Real Red, and Whisper White
Stampin' Write Markers:  Real Red, Cherry Cobbler, Wild Wasabi, So Saffron, and Rose Red
Ribbon:  Chocolate Chip 5/8" Satin Ribbon

Enjoy!  Purchase the products used for this project by clicking on the link which will take you directly to the product at my on-line store.


God's Blessings!
Guneaux Designs by Beverly Polen
Stampin' Up! Demonstrator in FL

Thursday, December 8, 2011

Stampin' Up! Christmas Card - Bells and Boughs

Hello, and thanks for stopping in to see my Stampin' Up! project share for today.  I am sharing with you a beautiful Stampin' Up! Christmas Card that features one type of a diamond fold.  The primary element on the card is the holly berries and leaves stamp image from one of my favorite Stampin' Up! stamp sets, the Bells & Boughs. The primary card stock for the card is the Stampin' Up! Real Red (although it looks darker in the picture).


The holly berries and leaves image is embellished with Dazzling Diamonds Stampin' Glitter, another of my favorites.  This glitter really bring a dazzle to any project.  Atop the element is a bird made with the Stampin' Up! Bird Punch and the Language of Friendship stamp set. The "Christmas" sentiment is from the Stampin' Up! Pines & Poinsettias stamp set.

The two side panels were made with Brushed Gold, Garden Green, and Whisper White card stock.  The panels are dressed up with the Soft Holly Standard Wheel and a poinsettia that I cut from the Holly Berry Bouquet Designer Fabric (don't limit yourself with what you can do with fabric).   Enjoy!

Purchase the products for this project by clicking on the product's link or by clicking here!

God's Blessings!
Guneaux Designs by Beverly Polen
Stampin' Up! Demonstrator in FL

Wednesday, December 7, 2011

Happy Anniversary: Stampin' Up! Greeting Card

Yesterday was the 1-year anniversary of my youngest daughter's marriage.  Her sweet husband wanted my help in making a hand-made Stampin' Up! Happy Anniversary card for her.  I let him choose the stamp set, Designer Series Paper, card stock, and inks to use in designing the card.  I helped him to assemble the card but everything was his design.  I think he did a wonderful job!

The card base is Pretty in Pink card stock and the two layers are from the retired Lap of Luxury Designer Series Paper.  I did  make the sentiment for him with My Digital Studio (loving that more and more).  The beautiful stamp image is from a retired hostess gift, the Northern Hearts.

He was so proud of himself, just as I was of him.  He really took the task seriously as it meant so much to him to be able to give his wife a hand-made Happy Anniversary card!  Is that a great husband or what!!!

He is an wounded soldier who served in Iraq and has many serious health problems.  However, the health problems did not deter him from ensuring his wife would be happy on their anniversary.

Are there any other great husbands out there who would, for the first time, make a hand-made card for his wife on a special occasion?  I had previously encouraged him to join me in making cards, but he didn't believe he could so he steered away from it.  To him I say, "Job well done"!

BUY STAMPIN' UP! PRODUCTS HERE!

God's Blessings!
Guneaux Designs by Beverly Polen
Stampin' Up! Demonstrator in Fl

Tuesday, December 6, 2011

How to Make a Waterfall Card Tutorial


Yesterday I shared a Stampin' Up! Waterfall Card with you, and promised to provide you with a tutorial today.  Here's the tutorial:

1.  Select your card stock, designer series papers (DSP), brads, stamp sets, jewels, etc., that you want to use to create your waterfall card.

2.  Cut and fold in the middle a 5-1/2" x 8-1/2" piece of card stock to form a 4-1/4" x 5-1/2" card base on which the waterfall construction will be attached.

3.  Using card stock and DSP, create the first and second layers for the card base (not the waterfall piece).  Do not adhere them to the card base until the last step as you'll need to attach the waterfall construction to these layers BEFORE adhering them to the card base.


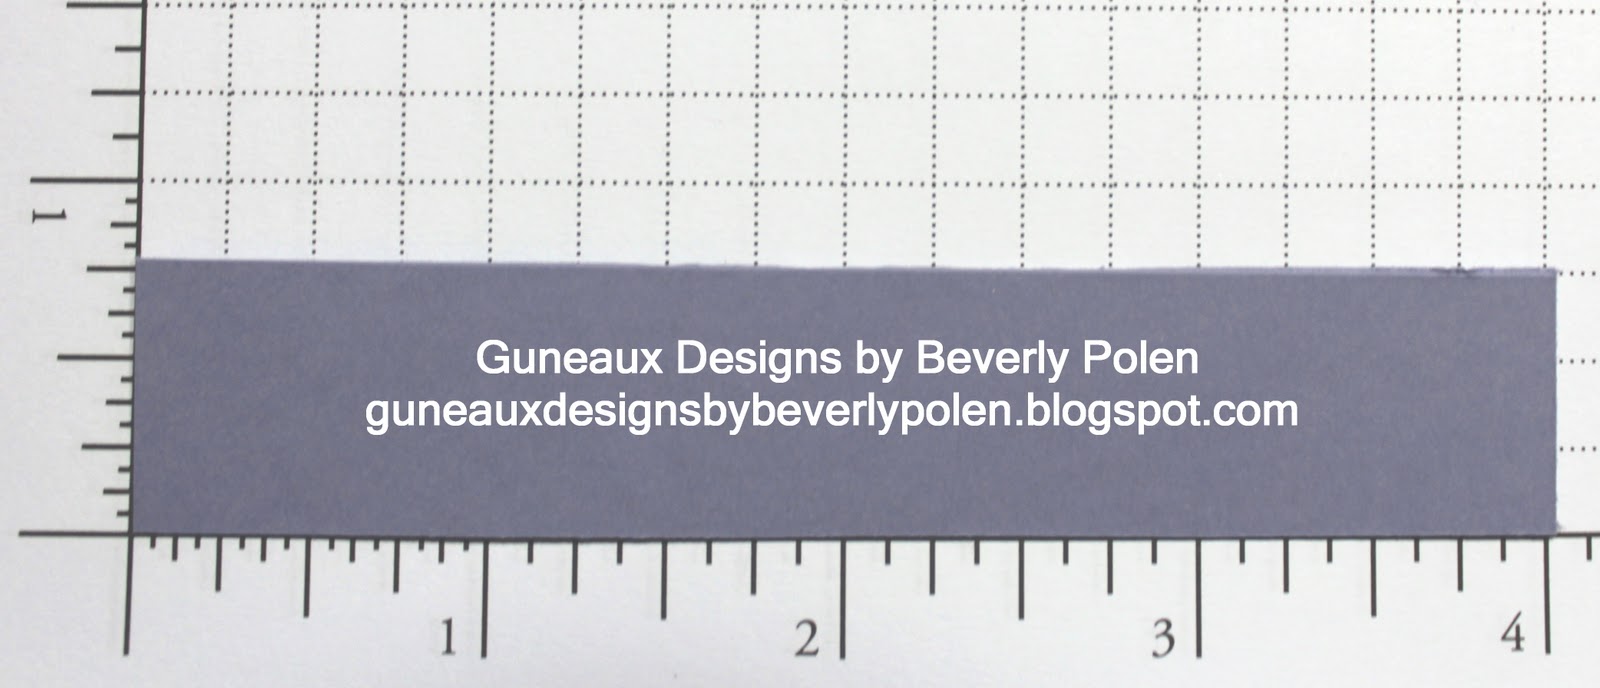
4.  Cut a 3/4" x 4" piece of card stock.  (Left click on the pictures for a better view.)


5.  Cut a  2-1/4" x 8-1/2" piece of card stock of a different color.


6.  Cut four 2-3/4" square pieces of card stock, four 2-1/2" square pieces of a different color of card stock, and four 2-1/4" square pieces of Whisper White card stock.  The pieces from the two colored card stock will form the mat for the Whisper White card stock that will contain your desired stamp images, punched items, etc.


7.  Score the 8-1/2" piece of card stock at the 1-1/2", 2", 2-1/2", 3", and 3-1/2" measurements.


8.  Turn the scored piece of card stock (henceforth called template) vertically so the score lines are at the top.  Attach Sticky Strip to the very top of the card stock (I added two pieces just to ensure good adhesion as the constructed waterfall will be heavy).


9.  Remove the red tape and horizontally attach the 3/4" x 4" piece of card stock from step 1 to the very edge of the template.  Ensure it is centered.


10.  Punch a hole at both ends of the 3/4" x 4" piece of card stock to add brads.  The brads need to be substantial as they will attach the waterfall construction to the card base (you could actually wait until you're ready to attach the waterfall construction to the card base before you insert the brads).


11.  Using the square pieces of card stock from step 5 and stamps, punches etc., create the waterfall pieces (i.e., the matted pieces of card stock that will be added to the template - see example).


12.  (a) Begin constructing the waterfall. The waterfall for this card will flow vertically; therefore turn the template so it is vertical and add the squares in a vertical fashion.  If you want the waterfall to flow horizontally, turn the template horizontally and add the squares to the template in a horizontal fashion. (The adjacent picture is turned horizontally just to identify the "areas" of the template.)


(b) Place adhesive in Area 1 (see the two pictures).  Beginning with the matted square that you want to be LAST in the waterfall, adhere it to the template.


13.  Place adhesive in Area 2 and add the matted square that you want to be the NEXT TO THE LAST waterfall piece.  Continue until you've attached all four waterfall pieces, with the front piece added to area 4.


14.  Fold the template at the top score line at area 4 so it falls behind the constructed waterfall and the tab falls at the bottom (see picture).  Decorate the tab if so desired.


14.  If you already attached the brads, you may need to remove them so you can line up the waterfall construction piece onto the card layers (created in step 3).  Based on the punched holes on the horizontal 3/4" x 4" piece of card stock, identify and mark where to punch holes into the card layers, and punch them.  Insert the brads through the waterfall construction piece and the card layers, turning down the brads' extensions.  Do NOT add adhesive any where on the completed waterfall piece or it will not work.

15.  Adhere the card layers and waterfall piece to the front of the card base.

16.  Pull the tab vertically and watch your waterfall in action.  ENJOY!

If you have questions regarding the tutorial, feel free to email me!

God's Blessings!
Guneaux Designs by Beverly Polen
Stampin' Up! Demonstrator in FL

Monday, December 5, 2011

How to Make a Waterfall Card: Happy Birthday Stampin' Up! Greeting Card

Today is a special day as it is my sweet granddaughter's birthday!  Happy Birthday, Erika!  I made this Stampin' Up! waterfall card for her, which closely resembles another waterfall card I made.

The "waterfall" shows the process of building a cupcake, using the Stampin' Up! Create a Cupcake stamp set and the Cupcake Builder punch.  My granddaughter loves pink and purple, thus I used the Wisteria Wonder and Pretty in Pink cardstock.  The top layer is the lavender design from the Flirtatious Specialty Designer Series Paper.  Other Stampin' Up! products used are the Pretty in Pink Flower Brads, a Perfect Plum brad from the Stampin' Up! Subtles Collection, a Trinket Crown, which represents the princess she is, and Basic Rhinestones.

 These pictures show the other three layers in the "waterfall".  


COME BACK TOMORROW FOR A TUTORIAL ON 
HOW TO MAKE A WATERFALL CARD


God's Blessings!
Guneaux Designs by Beverly Polen
Stampin' Up! Demonstrator in FL

Friday, December 2, 2011

How to Wrap the Gifts You Purchased This Past Weekend


Now that you've purchased many gifts during Black Friday, Cyber Monday, and throughout this week, how are you going to wrap them?   I suggest you decorate gift bags like I did this white one.

Simply cut pieces of Stampin' Up! Designer Series Papers to fit the size of your bag and glue them onto the bag in a pattern.  Leave space to include some stamping and embossing.  Then embellish with the Stampin' Up! Champagne Glass Glitter.  Viola....you have a beautiful gift bag to insert your gift, and the recipient will be quite amazed at your decorations!


Purchase Stampin' Up! products HERE.


God's Blessings
Guneaux Designs by Beverly Polen
Stampin' Up! Demonstrator in FL

Thursday, December 1, 2011

Beautiful Season: Stampin Up Christmas Card

Thanks for stopping by to see my Stampin' Up! Christmas card for today.  If I have to say so myself, I think this is another beautiful card.

This card features the Stampin' Up! Beautiful Season stamp set.  I love holly leaf stamps.  They are so Christmas!  And the beautiful bird in this stamp is different from a typical Cardinal that we think of around Christmas; however, he is so cute on the holly branch.

The "A Gift for You" sentiment is from the same Beautiful Season stamp set.  I love how Stampin' Up!'s stamp sets coordinate so well.  I occasionally have to remind myself of this as I can take that for granted after using Stampin' Up! stamps for so long. 

To make the card, I used Wild Wasabi Card Stock for the card base. I embellished the card base with the pine cones from the Pines and Poinsettias stamp set to which I added Dazzling Diamonds.  The mat behind the bird and holly was made with Real Red Card Stock that I embellished with the new Stampin' Up! Snow Burst Embossing Folder.  And the card is topped off with a Whisper White 5/8" Organza Ribbon bow.  I hope you enjoy the card enough to CASE it, and come back for tomorrow's feature.

Buy Stampin' Up! Products by either clicking on the links above or clicking HERE.
God's Blessings!
Guneaux Designs by Beverly Polen
Stampin' Up! Demonstrator in FL 


Wednesday, November 30, 2011

Holly Berry DSP: Stampin' Up! Christmas Card


I love the Stampin' Up! Holly Berry Bouquet Designer Series Paper (DSP)!  I used it to create this beautiful Stampin' Up! Christmas Card.  And, in case you've not noticed, I love this type of fold for a card. 


I used several Stampin' Up! products for this card.  They are: 

Card Stock:  Wild Wasabi and Cherry Cobbler 
Accessories:  Designer Frames Embossing Folder, Basic Pearls, Basic Rhinestones, White Embossing Powder, Tasteful Trim, Certainly Celery Glitter (retired), and Clear Trim Tinsel (retired)

This is a picture of the card's inside:


 I previously posted a tutorial for the fold used on this card.  Click HERE to see the tutorial.

You can buy the Stampin' Up! products for this and other projects by clicking HERE or click on the links above.

God's Blessings!
Guneaux Designs by Beverly Polen
Stampin' Up! Demonstrator in FL

Monday, November 28, 2011

Stampin' Up! Christmas Card 2011


I hope everyone had a wonderful Thanksgiving!  My Stampin' Up! Christmas card today is the result of an experiment.  I decided to see if I could emboss with two different embossing powders on the same piece of card stock.  It worked!!  I've learned that embossing powders will not cross contaminate. 

The top left side and the bottom right side of the card is embossed with Cherry Cobbler embossing powder.  The top right side and the bottom left side is embossed with Wild Wasabi embossing powder. 

I also used a permanent marker to color the pearls on the leaves.  It worked perfectly!


This picture if of the card's inside.  I hope you enjoy the card. 

Don't forget about the ongoing Stampin' Up! Extravaganza.  It runs through this Wednesday!


God's Blessings!
Guneaux Designs by Beverly Polen
Stampin' Up! Demonstrator in FL

Tuesday, November 22, 2011

Stampin' Up! Day of Gratitude

This week I will think about the many things for which I am grateful.  As I was deciding what Stampin' Up! (SU) card to make for today, I thought how grateful I am for the SU My Digital Studio (MDS) that allows me to create cards and scrapbook pages with retired stamps, embellishments, and Designer Series Papers (DSP).    

I loved last year's Autumn Spice DSP that was in the Holiday Mini Catalog.  I knew I had the  Autumn Spice Digital Kit that would allow me to create a card with some of the DSP.  Therefore, I used the digital DSP to create the first layer on this Old Olive card base.

Although I have in the Autumn Spice Digital Kit that includes the sentiment that I used, I also have the stamp set.  For the sentiment, I chose to use the stamp within the Day of Gratitude stamp set.  


I made the Cajun Craze mat behind the sentiment with a tag from the Lots of Tags Sizzlits Die Set and embossed it with clear embossing powder.  The leaves, which are also embossed, are from the Leaves #2 Original Die (love this die).  Can you see the heart that I formed with the stems of the two leaves?  I thought that would be cool for a "Gratitude" card.  The center of the heart is embellished with a Basic Rhinestone.  Lastly, the ribbon across the front of the card is Old Olive Grosgrain Ribbon which is no longer available.

You can purchase the products used for this project by clicking on the links above or my SU store link below.

For those of you in the US, I hope you are thinking about the things for which you are grateful this week! 

God's Blessings!
Guneaux Designs by Beverly Polen
Stampin' Up! Demonstrator in FL