Pages

Wednesday, December 7, 2011

Happy Anniversary: Stampin' Up! Greeting Card

Yesterday was the 1-year anniversary of my youngest daughter's marriage.  Her sweet husband wanted my help in making a hand-made Stampin' Up! Happy Anniversary card for her.  I let him choose the stamp set, Designer Series Paper, card stock, and inks to use in designing the card.  I helped him to assemble the card but everything was his design.  I think he did a wonderful job!

The card base is Pretty in Pink card stock and the two layers are from the retired Lap of Luxury Designer Series Paper.  I did  make the sentiment for him with My Digital Studio (loving that more and more).  The beautiful stamp image is from a retired hostess gift, the Northern Hearts.

He was so proud of himself, just as I was of him.  He really took the task seriously as it meant so much to him to be able to give his wife a hand-made Happy Anniversary card!  Is that a great husband or what!!!

He is an wounded soldier who served in Iraq and has many serious health problems.  However, the health problems did not deter him from ensuring his wife would be happy on their anniversary.

Are there any other great husbands out there who would, for the first time, make a hand-made card for his wife on a special occasion?  I had previously encouraged him to join me in making cards, but he didn't believe he could so he steered away from it.  To him I say, "Job well done"!

BUY STAMPIN' UP! PRODUCTS HERE!

God's Blessings!
Guneaux Designs by Beverly Polen
Stampin' Up! Demonstrator in Fl

Tuesday, December 6, 2011

How to Make a Waterfall Card Tutorial


Yesterday I shared a Stampin' Up! Waterfall Card with you, and promised to provide you with a tutorial today.  Here's the tutorial:

1.  Select your card stock, designer series papers (DSP), brads, stamp sets, jewels, etc., that you want to use to create your waterfall card.

2.  Cut and fold in the middle a 5-1/2" x 8-1/2" piece of card stock to form a 4-1/4" x 5-1/2" card base on which the waterfall construction will be attached.

3.  Using card stock and DSP, create the first and second layers for the card base (not the waterfall piece).  Do not adhere them to the card base until the last step as you'll need to attach the waterfall construction to these layers BEFORE adhering them to the card base.


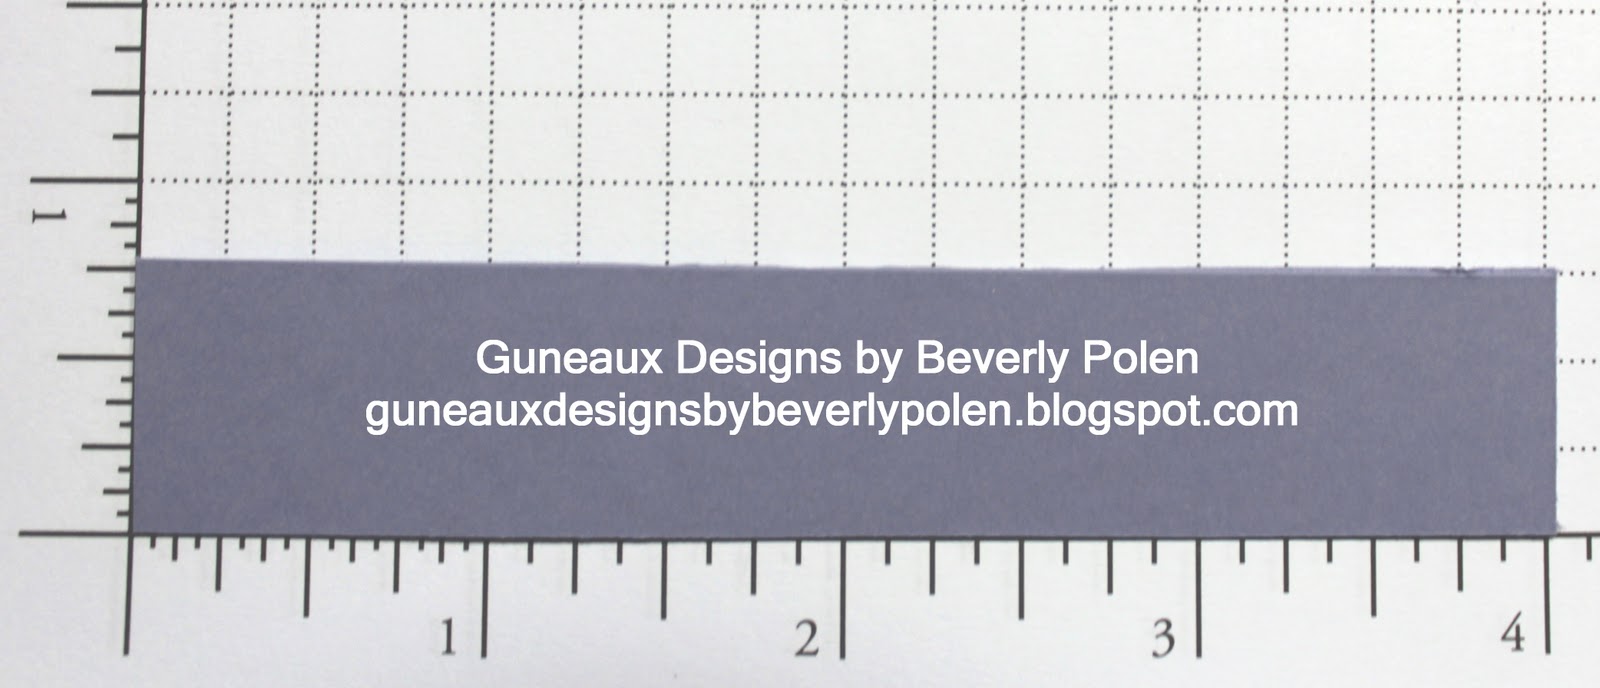
4.  Cut a 3/4" x 4" piece of card stock.  (Left click on the pictures for a better view.)


5.  Cut a  2-1/4" x 8-1/2" piece of card stock of a different color.


6.  Cut four 2-3/4" square pieces of card stock, four 2-1/2" square pieces of a different color of card stock, and four 2-1/4" square pieces of Whisper White card stock.  The pieces from the two colored card stock will form the mat for the Whisper White card stock that will contain your desired stamp images, punched items, etc.


7.  Score the 8-1/2" piece of card stock at the 1-1/2", 2", 2-1/2", 3", and 3-1/2" measurements.


8.  Turn the scored piece of card stock (henceforth called template) vertically so the score lines are at the top.  Attach Sticky Strip to the very top of the card stock (I added two pieces just to ensure good adhesion as the constructed waterfall will be heavy).


9.  Remove the red tape and horizontally attach the 3/4" x 4" piece of card stock from step 1 to the very edge of the template.  Ensure it is centered.


10.  Punch a hole at both ends of the 3/4" x 4" piece of card stock to add brads.  The brads need to be substantial as they will attach the waterfall construction to the card base (you could actually wait until you're ready to attach the waterfall construction to the card base before you insert the brads).


11.  Using the square pieces of card stock from step 5 and stamps, punches etc., create the waterfall pieces (i.e., the matted pieces of card stock that will be added to the template - see example).


12.  (a) Begin constructing the waterfall. The waterfall for this card will flow vertically; therefore turn the template so it is vertical and add the squares in a vertical fashion.  If you want the waterfall to flow horizontally, turn the template horizontally and add the squares to the template in a horizontal fashion. (The adjacent picture is turned horizontally just to identify the "areas" of the template.)
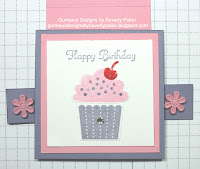


(b) Place adhesive in Area 1 (see the two pictures).  Beginning with the matted square that you want to be LAST in the waterfall, adhere it to the template.


13.  Place adhesive in Area 2 and add the matted square that you want to be the NEXT TO THE LAST waterfall piece.  Continue until you've attached all four waterfall pieces, with the front piece added to area 4.


14.  Fold the template at the top score line at area 4 so it falls behind the constructed waterfall and the tab falls at the bottom (see picture).  Decorate the tab if so desired.


14.  If you already attached the brads, you may need to remove them so you can line up the waterfall construction piece onto the card layers (created in step 3).  Based on the punched holes on the horizontal 3/4" x 4" piece of card stock, identify and mark where to punch holes into the card layers, and punch them.  Insert the brads through the waterfall construction piece and the card layers, turning down the brads' extensions.  Do NOT add adhesive any where on the completed waterfall piece or it will not work.

15.  Adhere the card layers and waterfall piece to the front of the card base.

16.  Pull the tab vertically and watch your waterfall in action.  ENJOY!

If you have questions regarding the tutorial, feel free to email me!

God's Blessings!
Guneaux Designs by Beverly Polen
Stampin' Up! Demonstrator in FL

Monday, December 5, 2011

How to Make a Waterfall Card: Happy Birthday Stampin' Up! Greeting Card

Today is a special day as it is my sweet granddaughter's birthday!  Happy Birthday, Erika!  I made this Stampin' Up! waterfall card for her, which closely resembles another waterfall card I made.

The "waterfall" shows the process of building a cupcake, using the Stampin' Up! Create a Cupcake stamp set and the Cupcake Builder punch.  My granddaughter loves pink and purple, thus I used the Wisteria Wonder and Pretty in Pink cardstock.  The top layer is the lavender design from the Flirtatious Specialty Designer Series Paper.  Other Stampin' Up! products used are the Pretty in Pink Flower Brads, a Perfect Plum brad from the Stampin' Up! Subtles Collection, a Trinket Crown, which represents the princess she is, and Basic Rhinestones.

 These pictures show the other three layers in the "waterfall".  


COME BACK TOMORROW FOR A TUTORIAL ON 
HOW TO MAKE A WATERFALL CARD


God's Blessings!
Guneaux Designs by Beverly Polen
Stampin' Up! Demonstrator in FL

Friday, December 2, 2011

How to Wrap the Gifts You Purchased This Past Weekend


Now that you've purchased many gifts during Black Friday, Cyber Monday, and throughout this week, how are you going to wrap them?   I suggest you decorate gift bags like I did this white one.

Simply cut pieces of Stampin' Up! Designer Series Papers to fit the size of your bag and glue them onto the bag in a pattern.  Leave space to include some stamping and embossing.  Then embellish with the Stampin' Up! Champagne Glass Glitter.  Viola....you have a beautiful gift bag to insert your gift, and the recipient will be quite amazed at your decorations!


Purchase Stampin' Up! products HERE.


God's Blessings
Guneaux Designs by Beverly Polen
Stampin' Up! Demonstrator in FL

Thursday, December 1, 2011

Beautiful Season: Stampin Up Christmas Card

Thanks for stopping by to see my Stampin' Up! Christmas card for today.  If I have to say so myself, I think this is another beautiful card.

This card features the Stampin' Up! Beautiful Season stamp set.  I love holly leaf stamps.  They are so Christmas!  And the beautiful bird in this stamp is different from a typical Cardinal that we think of around Christmas; however, he is so cute on the holly branch.

The "A Gift for You" sentiment is from the same Beautiful Season stamp set.  I love how Stampin' Up!'s stamp sets coordinate so well.  I occasionally have to remind myself of this as I can take that for granted after using Stampin' Up! stamps for so long. 

To make the card, I used Wild Wasabi Card Stock for the card base. I embellished the card base with the pine cones from the Pines and Poinsettias stamp set to which I added Dazzling Diamonds.  The mat behind the bird and holly was made with Real Red Card Stock that I embellished with the new Stampin' Up! Snow Burst Embossing Folder.  And the card is topped off with a Whisper White 5/8" Organza Ribbon bow.  I hope you enjoy the card enough to CASE it, and come back for tomorrow's feature.

Buy Stampin' Up! Products by either clicking on the links above or clicking HERE.
God's Blessings!
Guneaux Designs by Beverly Polen
Stampin' Up! Demonstrator in FL